
The axe is finished but I need another of those hooked ends for the right shoulder, so casting it seems logical, if a little fiddly-- that's what I was trying to avoid, not having to scratch build another--oh well. The part had to be half buried in plasticine, boxed up and covered with a layer of silicon rubber. This picture shows that the plasticine has been removed and the second half ready to be poured. Note the supports necessary to keep everything steady and square while the rubber sets.

A complete casting with the hook still in position in one half of the hold. You can see the thickened end where the resin was poured and the extended tip where the air escapes. At this stage the resin is very soft and can be manipulated to a certain extent (as I did with one of these castings to make a sword handle for the model's back).

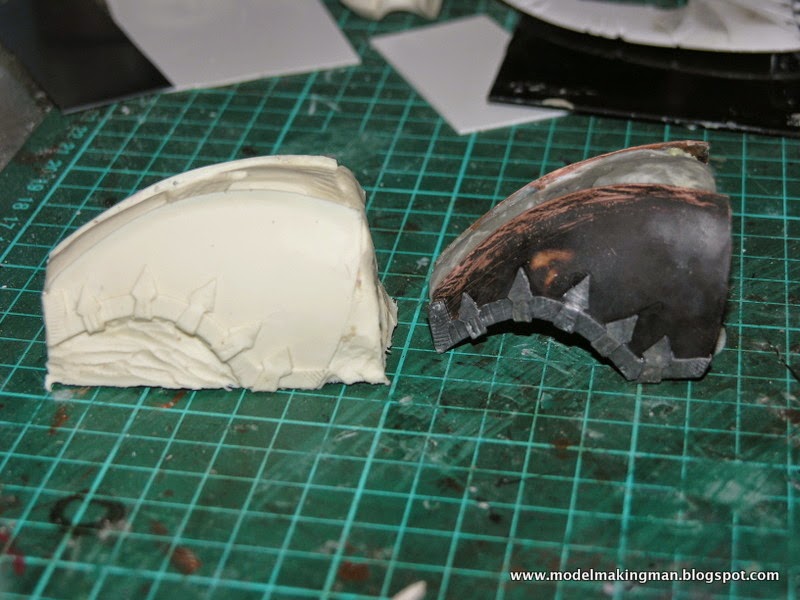
Here we have the two hooks, a bi-cloured original and its cast clone, all cleaned up ready to be mounted on the shoulder guard. This guard is a major part of the model and carries many elements, one being a large upright spike. I first intended to make this in balsa (as you see above), but on closer examination of the painting, I noticed it was more angular and so used a block of very hard grey plastic which was able to be ground on a sanding machine. The result is on the left and, even in this photo, looks much harder and sharper than the balsa one beside it.

The guard was basically three pieces, two curved sides and a mid section that separated them. I had some quite heavy gauge copper sheet (from a large plant pot), and decided to use it because I would be able to get the necessary curves in the sides. To do this I used the top of a cold chisel (slightly rounded) and tapped repeatedly onto the copper resting on a thick piece of balsa. This soft but firm substrate allowed the chisel's rounded form to gently curve the metal----cool, it worked!

Here are the three parts held together with super glue-- note the white chlorosis that occurs when an accelerator is used with the CA glue. The middle section was made with lead sheet as it is more malleable than the copper and this section had to be at a specific distance from the top of the sides to allow ridges to form on the top surface. I needed to be able to bend the sides in or out to match the shoulder width of the torso and a flexible lead join worked well.

At this stage the guard's top has been covered by a layer of Kneadit, cured in a turbo oven and sanded to the final levels with ridges on top and a solid plug of epoxy at the smaller end to allow the hook to be mounted. I still had to apply the arrow head decoration, the top spike, a flayed skin face and stuff that would appear on the rear surface, along with some other structures and more smaller spikes. This was just one element of a much bigger build --what had I let myself in for?

This is where I was so far. I had a workable body, a complete axe, a lovely off centre helmet (undercoated to help fill the resin holes), a cast second hook, a semi-finished shoulder guard and spike --now to those arrow heads.


The decoration was more than just one layer of spikes. It had a degree of bas relief about it, in that the actual arrow was on top of a carrier strip. This suited me because I hate a flat surface,- bumps, dings, lumps, I love'em. Lead sheet again to the rescue and as you can see on the axe, it is really easy to make follow any curve.

Once all the flat decoration was on , I realised that this copper guard was very heavy but fragile. How to unify and lighten a piece? It became another candidate for the pink stuff and had to be boxed up, but this time the shape leant itself to a single piece mold, much simpler.

I have mentioned that molds have to be supported so that the silicon and resin can flow evenly etc etc. Just look at this arrangement that allows a filled mold to have part of its volume replaced by a shaped piece of balsa and thus create a hollow form. The real guard would have to fit over a shoulder and so does this one. I needed it to be as thin walled as possible without sacrificing strength. I part filled the mold with resin, then forced the plug into the liquid until it came up to the top- a bit hit and miss but resin goes off pretty quickly in our temperatures so I had to wing it.

Here we see the raw guard and the master from which it was made. This is not a waste of time as two of these could make a space marine's pauldrons with a bit of grinding and embellishing --better than starting from scratch. These needed to be thinned considerably but a Dremel tool does that work very well -- CAUTION resin dust is no good for the lungs so, mask, ventilation and care.


On this note I will finish this entry with a nicely thinned pauldron fitting on to the Nurgle champion who looks like he's had a bit of work done. Next time, the body.
No comments:
Post a Comment