Sunday 29 January 2012

Trilobite model

These two photos are from a David Attenborough series, First Life, which focussed on prehistoric animals and plants living well before the much vaunted age of dinosaurs. He found that some of the most spectacular fossils of that dominant creature, the trilobite, were to be found in Morocco. When we saw the series my wife was quite taken with these much more interesting trilobites and so I determined to give her one for her birthday. But do you have to go to Morocco?


This is how I went about making my own "Moroccan fossil trilobite".
A block of casting plaster was quickly formed with one end higher than the other. This would give the particular animated look that these recent trilobite fossils have-- most I was familiar with were flat impressions in rock with very little 3D-ishness about them.


For the body of the creature I used balsa wood carved with a raised front as if it were climbing a slight slope. 
 
 
Over the raised spine of balsa I modelled the segmented basic shape of the typical trilobite, referring to the DVD or book as I needed. I used an interesting material for this basic body bulking phase as it is cheaper than the Apoxie Sculpt which I would use for the  majority of the build. It is called Ferropre and is a pipe jointing putty used by plumbers. As seen in the pictures, it is darker than the Apoxie Sc. but is a similar two part  material and would be compatible  with any modelling putties (milliput, greenstuff, Tamiya ,Magic Sculpt etc). There is of course a drawback to using anything which appears too good to be true. Ferropre is sooo sticky, it has to be mixed UNDER WATER.Wet  your hands before you dip into the white compound to mix with an equal part of the black, then combine to an even coloured dark grey, in a bucket of water. As well as being 'interesting ' to mix, it is also a lot softer than other putties, so does not hold  detail until it  has begun to go off, but once it has, it is an excellent base for modelling. A 2kg  pack of Apoxie Sc.(with shipping) cost me $114 while  the equivalent amount of Ferropre cost about $40 and was available at a local plumbing supplies store.


I began to add detail with Apoxie Sc. and the form started to take shape.  


The head was a particular area I wanted to get correct as the animal seems to be crawling up and over a small rise, actually looking at the viewer. I added small pittings and texture to this head area and made sure I had good strong bases for the very special spines which decorated this species of trilobite.


Wire with putty wrapped around would become the many spines seen on the original photo and as this animal is symmetrical side to side, equally shaped and sized  spines would have to be made. I worked out the pattern for the total number, then cut wire, formed putty around each and cooked the lot of them in my Turbo Oven. This picture shows the importance of the base attachment points all over the body .  


This shows the main sculpting of the segmented body.           


The main body is complete and the fiddly 'fringes ' have been added. They were a pain in the proverbial as they had to be identical in shape but taper in size with the body. I also found I had made the plaster base a bit too narrow, but that's modelling isn't? You just find a way to make it all work.                   


This is one of at least 30 small swimming 'legs' arranged symmetrically on either side of the body and each had to be refined, fitted and sized for its specific location. Add caption


The head had a lot of character, as it seemed to look at you with its large compound eyes and with all those feelers advancing, the impression is of an intelligence far beyond the primitive times in which it lived.


All the modelling is done and all that remains is to add the cured spines. Holes are drilled and the support wires are inserted, positioned and super glued in place.            


Lots of spines decorate the rear end of this species and they didn't  want to fit into place, but with many a curse and a wiggle or two, all was well.    


This shows the completed, unpainted model in front of my reference photos .


In the film, the trilobite fossils seemed to be a shiny black against a pale ground rock, so I masked my plaster base  with Maskol ( after it had been sealed with super glue)  and prepared to spray the upper surface a satin black.


What a job removing that Maskol! I'm not sure about the shiny paint but I haven't changed it yet.


At last finished, delivered and appreciated. Not too sure about that shiny black but I doubt anyone else is bothered so there she stands.


Sunday 22 January 2012

Space Marine display

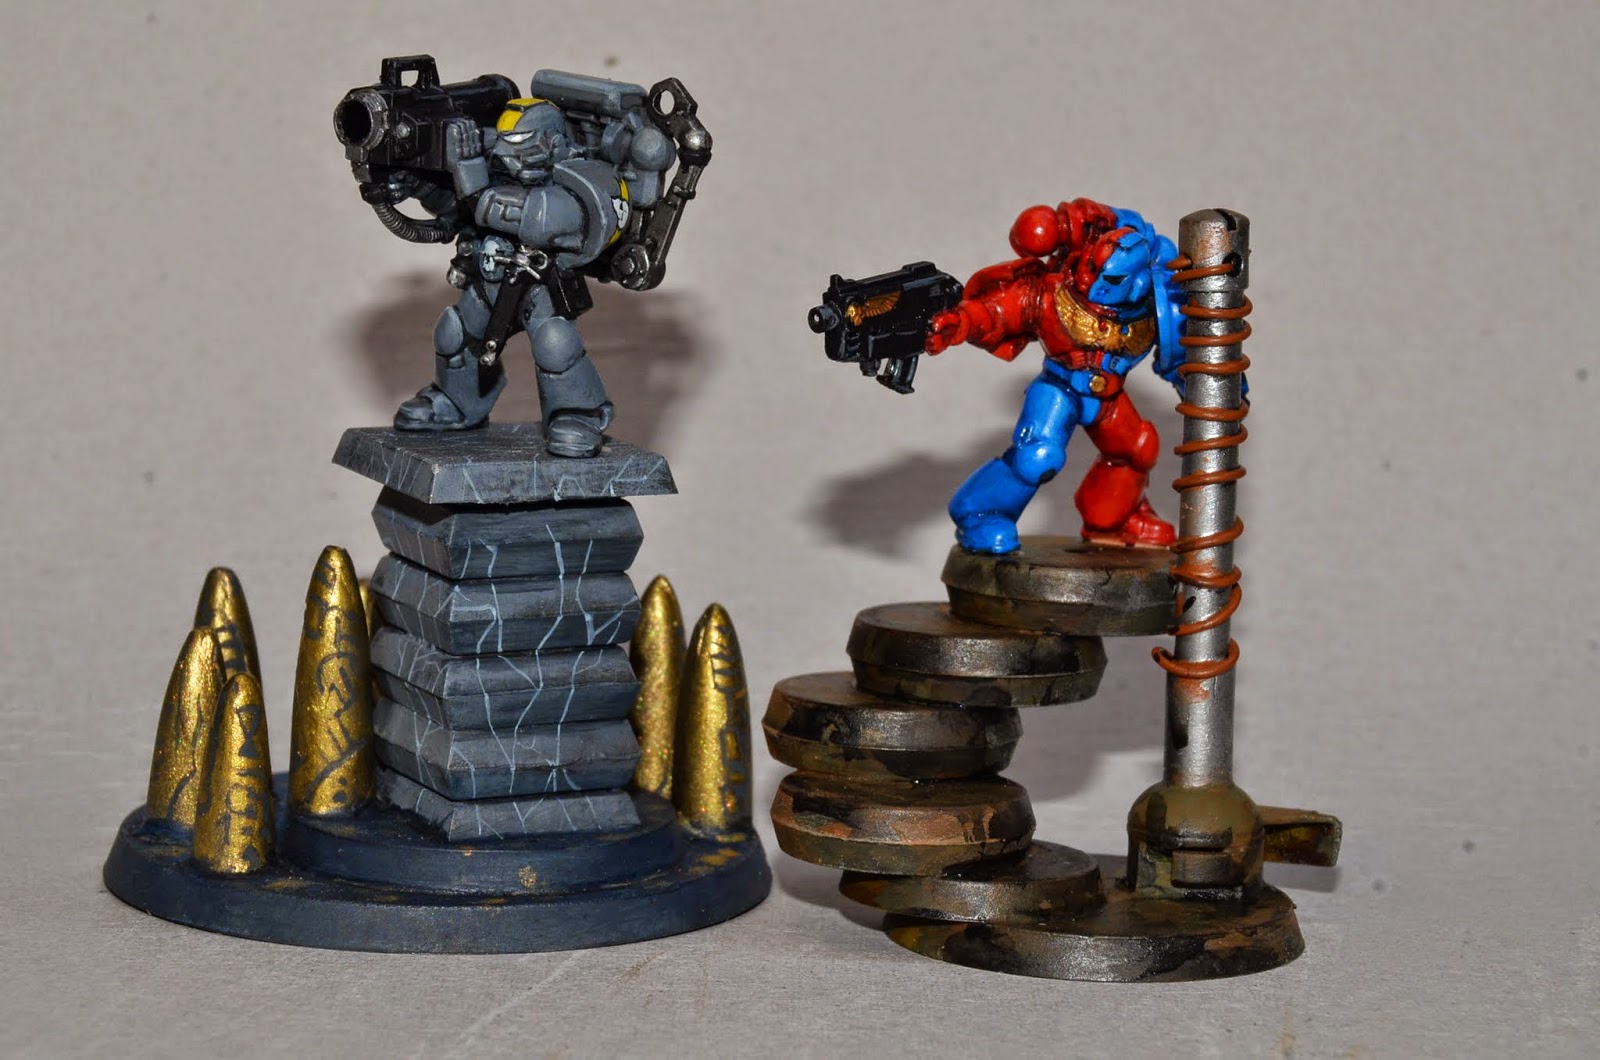
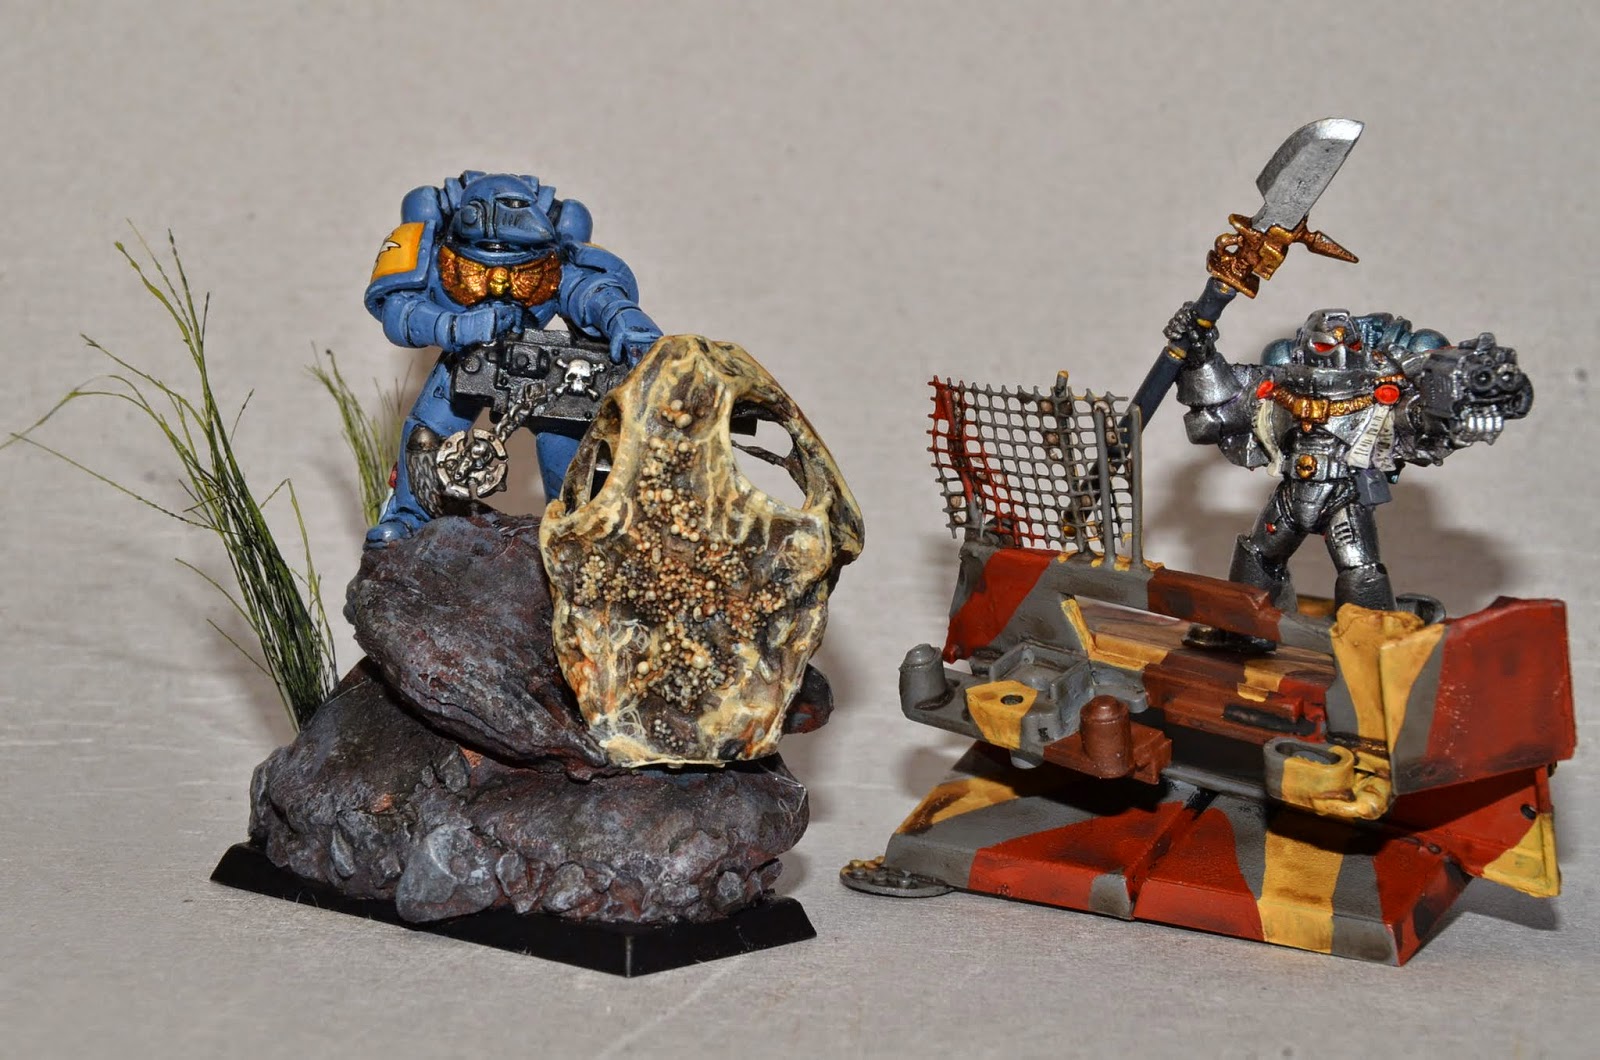
                This is part of what will be a cabinet containing about 72 models of Space Marines from Games Workshop. What I have tried to do is paint a number of different Chapters of these futuristic warriors to a decent standard while posing each one on its own unique base. I find this basing,  the most interesting part of the whole endeavour and have used some weird and wonderful stuff to show off each model. If you look carefully you can see broken plastic clothes hangers, wooden skewers, a toad's skull and different ways to use GW's own bases. Bromeliad flowers and roots, with their strange forms are a favourite of mine.              


REVILERS           BRAZEN CLAWS  
       

                         HUNTERS OF ARACHIS     STAR DRAGONS                                      


                                      BLOOD   RAVENS                  WHITE MINOTAURS


                                BLACK TEMPLAR     SALAMANDER CAPTAIN                                          


BLOOD ANGEL SCOUTS                IRON HANDS


SPACE WOLVES                GREY KNIGHTS


SONS OF ORAR              BLACK T. TERMINATOR


BLOOD A. TECHMARINE       SCYTHES OF THE EMPEROR


RAVEN GUARD      RAPTORS


 STORM GIANTS     MORTIFACTORS


DEATHWING TERMINATOR         IMPERIAL FIST


CRIMSON FISTS     HAWK LORDS


TIGERS ARGENT            SALAMANDERS


WHITE SCARS        ULTRAMARINES


DARK ANGELS       MENTORS


Thursday 19 January 2012

Arachnarock diorama ( Build part 1)


 This is Games Workshop's Arachnarock, a giant spider  which can be summoned by Goblin shamen using the appropriate bait (probably something involving blood & guts.)   I have assembled it here and filled any obvious seams, but it is an impressive moulding which didn't require a lot of effort. I did add some micro balloons as a bit of detailing on the underside and on top of the last leg joints .These were sprinkled onto patches of super glue applied to specific areas with a toothpick.


 The model was then undercoated in flat black (from the local h'ware). I said it was impressive and red goes so well with black don't you think? What a monster!

My basic idea is that the goblins are in the act of the Summoning at the bottom of the spider's rocky cliff home, so I need a cliff slope and an area for the  goblins and their bait. This overall structure is made from 3mm styrene plastic , also called plasticard-- I will refer to it in future as styrene (as opposed to polystyrene, the soft white packing material which is also used in this build). The dimensions are - length
280mm, height 290mm, width 130mm. The overall look of this diorama will be different in that it is tall and thin, not a single level as many dio's are.


 Apart from the shell of styrene, the main structure is this plywood spine covered with chunks of polystyrene, which makes the actual cliff slope. This will be coated thickly in casting plaster and the rock detail carved into it. The brace at the back is shaped balsa, necessary to maintain the angle.

When pouring plaster, some type of  form is usually necessary so that  the final shape is basically what you need when the detail work has to be done. My pouring base was a strange, bent shape and so the box form I had to build using sheet styrene was a bit of a problem, in that it needed to be water-tight , balanced and strong enough to withstand quite a weight of wet plaster.

Ready to pour! The sausages of Klean Klay( adult plasticene) are visible at  all the corners and are used underneath  to thoroughly seal the form before pouring the plaster. Note  the arrangement of  the side pieces, in that they  are placed in a rotational manner. This method allows any flat sided form to be boxed with as little precise measurement as possible. The p'styrene chunks are glued with white glue and when doubled, are pinned with toothpicks- the dots visible.
 
 
The end result of the pour-a great hunk of very rapidly going off plaster. I try to work as quickly as possible on the block in its "green state", while it is still soft. Casting plaster is much harder than Plaster of Paris  and therefore much more robust, but you really have to work it quickly if you don't want to do all the details  with a motor-tool. You can see the beginnings of my rock wall even at this early stage.


My idea for the rocks was that they would be sedimentary or at least have some unifying characteristics, so I scribed a horizontal linear pattern across the cliff face. Initially I used a hand tool with a curved hook at one end and a diamond shaped point at the other but the plaster beat me to it and I had to resort to my motor tool with a fine carving bit. Our climate in January says "plaster will go off fast" so I am prepared to go mechanical.


 Here is the final rock face with a bed of Celluclay ( a very good instant papier mache)  making the lower flat area where the goblins will be placed. The surface, being adhesive when wet ,was then sprinkled with various coarse sands , railway ballast and some rock-like pebbles placed in position. The sides of the dio needed some refining and this was done with more Celluclay while some extra plaster was mixed to round out the top. Overall I am happy with the result so far, but there will be some shrinkage of the  Celluclay, which although a great product, takes an awfully long time to dry, especially in our current weather, wet every second day.


There we have it. The Arachnarock is descending the cliff -with the help of a bit of fishing line  attached to her nether regions. Oh yes, it would probably be a lady monster (ala Shelob),  and I don't think she'll be too pleased to haul her vastness down the cliff for some standard goblin rubbish. Let's hope the next part of this build will provide her with something yummy!

Monday 16 January 2012

Where I work and display cabinets

 I live in a two story typical Nth Queensland house, upstairs living, downstairs garage, laundry, work areas etc. Over the years I have taken this lower space and made it work for me in whatever venture was the go at the time -motorcycles, screen printing, photography, golf or now, as it has been since 1996, modelling. These pictures were taken at dusk with  a Nikon D7000 on a tripod, f22 and timer setting. The above shows me at my desk with the current job--a diorama using the Citadel model giant spider Arachnarock, being lured down a cliff by Goblin shamen. This will be the subject of an individual post or two, showing stages of the methods I use.

A view from the front of the house through my work area,,showing storage cabinets (on the floor for models and the wall for paint). Beyond the desk are steel cabinets for woodworking and general heavier tools, my spray booth and the back door.  I am lucky in that I have a very good flowthrough and hence more than adequate ventilation as our temperatures are often well above 30C and humidity  in the  80's.

This is the front of the workshop and shows the plethora of junk a modeller accumulates, from necessary fans to half made dinosaur armatures , shelves of undercoat sprays,  sundry Warhammer figures, plastic rods and tubes and STUFF of all shapes and sizes.


As I was an  aircraft  and armour modeller before I discovered the small world of 28mm fantasy figures and their consequent dioramic delights, I used airbrushes all the time. I have a Badger 155 Anthem for  general work and an Iwata HP-BH  for fine jobs like Italian airforce camo schemes. My air sources are either an 8cu.ft compressor (mounted under  the dinosaur in the previous picture) or the small but very efficient Iwata Smart Jet Pro shown above. They do  their stuff in a homemade spray booth with dual exhausts exiting through the large tube, over the wall into the carport. The blue curled hose feeds the Anthem and also pumps up bike tyres, balls and blows dust to - well you know where dust should go.


The other main area of the downstairs space houses my modelling display cabinets of which I have  four.This was my first and contains only 1:72 scale aircraft of WW2,  all sorted by nationality with particular emphasis on the lesser known types such as those of Italy, France and Australia. I really like the weird German Blohm and Voss BV 144 and the Italian SM79 - basically I like weird! Below the cabinet are boxes of artwork from twelve years of screen printing  and on top is an elven tower , some black and white photographs from my darkroom days and the inevitable STUFF.


 My second cabinet is a mirror of my changing interests having quite a number of 1:72 aircraft (this time mainly jets), but also some larger items such as dioramas , figures and the beginnings of some early scratch builds. There is my 'Spider Tank' which really deserves another look at (before the plastic decides its had enough of this uv lark and disintegrates.) The most interesting plane in the cabinet is a BV 288 which you get by joining two BV 144's side by side. I can just see my daughter's take on a Jurrassic Park Velociraptor as a showgirl -  feathers , spangles and all. Below are the many boxes you need if you ever have to move your models. A good idea in this digital camera age is to photograph your actual packing method, then you  can repack the damn things easily.


This is my largest cabinet  (1.8m x3.0m) and is where I started to model armour and Warhammer figures. The photo is of course distorted by the wide angle lens and reflections but I can make out the big figure  at the top left which is my most ambitious sculpt. This is Korpus Festerheart  - champion of Nurgle. I hope to enter this in the 2012 Australian Golden Demon  competition in the Open division.
As you can see, the variety of models has increased if , as is inevitable, the rate of completion has definitely reduced. There are quite a few planes which deserve their decals and some of those tanks really do need a good weathering but what do I really need to do? This blog is like a good modelling session and at least I don't smell of glue or paint.


The last display is a smaller cabinet (550mmx800mm), and is purely for Warhammer40K Space Marines -the good guys. There are nine shelves - one of 120mm , one of 95mm and seven of 75mm. Was there  a reason for this division? That's what I had made before I even thought of putting them altogether and then had to make the case to fit. The hardest part was finding a place to hang it once made -many bookshelves  had a radical re-arrangement, but all to the final good. That big dark 'bookend' was once a diorama for my scratch built  Jailer, from the Darksiders computer game - he might get a 'How I built it post' some time in the future.