

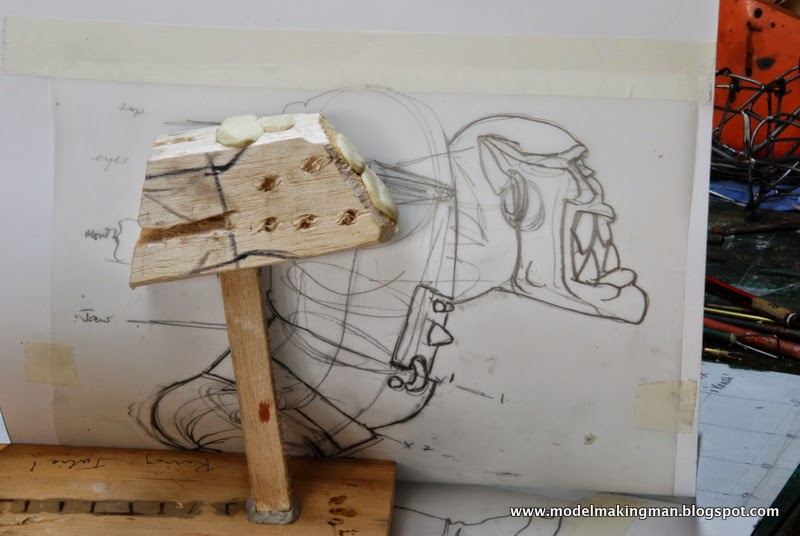
The first thing I had to do was get the dimensions of a basic ork and transpose them to a plan from which all the other parts could be gauged. Once the proportions of the ork were correct, then an armature could be made in wire.

Here we see the armature against the full sized plans, both front on and side views. I photographed the miniature from all angles and enlarged them to the correct size so that it is simply a matter of transferring dimensions from plan to model when making any part.

At the time I was building this model, I had not started to use Apoxie Sculpt and the material I preferred was Sculpey. This is wonderful to model with but does require heating to make it hard. On such a large build as this one, the heat source had to be something other than the kitchen oven, but I had a paint stripper heat gun that, with careful use, would do the trick. You can heat parts a number of times, just to harden them and allow more work to be carried out, but this tends to make the surface brittle so judicious use was made of it. Too hot for too long and the surface blistered and bubbled.


The moment of truth - head attachment time. At this point it seems a little top heavy but remember that the head has all its flesh whereas the body has yet to receive its layers of Sculpey, let alone muscles, skin and clothes, weapons and grime.

Orks don't have much in the way of good posture and are rather hunched, muscle bound creatures, so I needed to add a large shoulder and back piece. This was done in one hit with a block of balsa attached at the top. It could have been done in foil, but I think I chose one block as it could have had a function when some of the mechanical superstructure was to be added later.

So far we have seen the use of wire and foil, to bulk out the body. Now it is the turn of Celluclay, a type of instant papier mache, most often used to make groundwork for military dioramas. This covers the whole body, except the head, and prepares the surface for its layers of Sculpey. By using such a homogenious and well covering material as this, any highs or lows in the foil layer can be smoothed out and, most importantly, less of the expensive Sculpey, needs to be used. The rule seems to be - inside layers cheap, getting more expensive, until the real surface is rendered in the best stuff you can afford. You get what you pay for! (Yes I was making a dinosaur, the same way, at the same time )
Next entry, we will get mechanical!