 |
 | ||
I had an armature which was destined to be an ogre tyrant at one stage, but that didn't happen and so its size determined the final size of Korpus. This meant that proportional gridded drawings had to be made from the copy of the painting I had. You can see the 1:1 tracing on the left and the final sized plan on the right. The armature was made of a wire frame bulked with wound paper and covered with Das. The shape of an ogre suited a change to a bulging champion of Nurgle, so really it was perfect. While there are many stages in the making of any part of a model, they cannot all be shown, suffice it to say that making the axe, to the desired scale, shape and look desired, was the first hurdle to be overcome successfully. Balsa was used for the haft and various thicknesses of styrene plastic for the blade. The gap between the two sides was filled with Kneadit (a quick setting epoxy putty) and when dry, the whole was sanded to the final form. 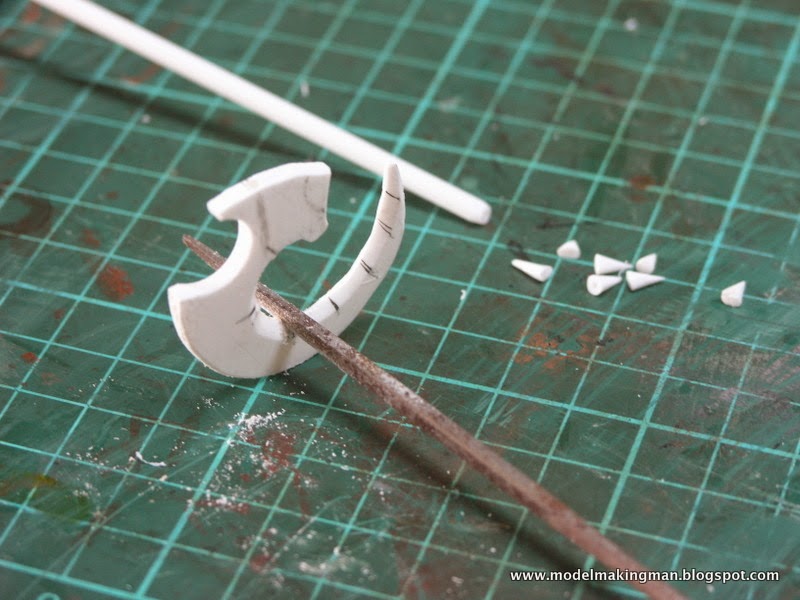 
In the painting there are a number of design elements that are repeated, one of them being the hooked device on the end of the axe and the right shoulder guard. I decided to make one, then cast a couple of others, maybe to be used on the back of the figure. Thick styrene was chosen and using the score and snap method, drilling and a fret saw, the basic shape was roughed out.
 As you can see from the painting, the monster has a peculiar asymmetric helmet with a single off- centre horn. To make this, I push-formed it by heating a sheet of styrene over a hole in a piece of plywood and when very soft, pushed a spherical peg (from a children's game), into and through the hole. This hollow form was then filled with resin which made any subsequent shaping very easy. 
Seen from the side, the helmet has an extended flange so all the material above this had to be removed and a sort of 'waist' created. Resin is the perfect material to work with when something has to be filed, drilled or ground away.*** ALWAYS USE A MASK*** nasty stuff resin dust!
 The balsa horn is attached-pinned and super glued- and the repeated motif of arrowheads in lead added. Korpus had a strange way of viewing the world in that there need to be three vertical slits in the helmet, so these were drilled and shaped with a fine Dremel bit.  The material on the left is a very hard plastic which was given to me 'Just on the off chance that you could find a use for it'. This happens a lot with my friends and the stuff is great for making sharp spikes that are so beloved of Nurgle.  I thought I'd end this first part with an overall look at my work area. You can see that while the Korpus job was on the go, so too was the trilobite for my wife's birthday. In the centre back, the helmet is trial fitted to the Das armature which has had its first coating of Apoxie Sculpt. Those grey brushes near the black mini vice, are actually silicon tipped and are very handy when detailing epoxy. Under the desk is a hair dryer in a pvc tube and it comes in handy for many jobs, especially quick drying of paints, general blowing of stuff and hardening of epoxy. Next time I'll get into some pink stuff-- casting! |

No comments:
Post a Comment