

There aren't many classic illustrations of our friend Typhus, Herald of Nurgle, but these two keep popping up in reference to him. The left pauldron, in these cases, shows an open mouthed daemonic head. (In the Warhammer world, yes there is an an extra 'a'). On the official Games Workshop miniature of Typhus, the emblem on the left shoulder is a giant fly, Nurgle's favourite carrier of disease, but I had enough of flies during the Korpus Festerheart build and so it was the daemon for me.

I started with the problem area first, the open mouth, seen in the illustrations as a blank blackness. What to do? I did have a fall back device though, the hive structure I had used to gap fill on the main body. This was joined to the lower jaw and we were away. The daemon had a central nasal horn and two large curved fangs in the lower jaw. These were all made of Apoxie Sculpt, cured separately in the turbo oven and scored with a sharp tool to give a bony, horn like appearance. The toothpicks were inserted to make the handling and heating processes easier.

The large upper jaw needed to be made of putty as well as all the other bits, but the Apoxie I use for general modelling takes too long to cure to hold this hollowed shape. Kneadit to the rescue! This stuff goes off so quickly that I was able to form the shape roughly, attach it to the pauldron top and keep the gap open, all in about two minutes. Within ten minutes I could use a motor tool to grind away any imperfections and have it ready to be worked upon with the detailing putty- great stuff.

I had recently bought this Dremel bit and now had found a perfect job for it. The fangs needed a good strong attachment and by grinding the base down to a smaller peg, (easily done with such a nice square tool), they were able to be housed in the jaw in a secure but small hole. I don't like gluing things together without some sort of connective piece, be it a pin of wire or in this case, a peg.

In they go. I probably shouldn't have glued them at this stage as it would have made the teeth fitting a bit easier but there you are, you can't get it right all the time. I think the question came up as to glue or not to glue, but ' what the heck' won and so the teeth went in later.
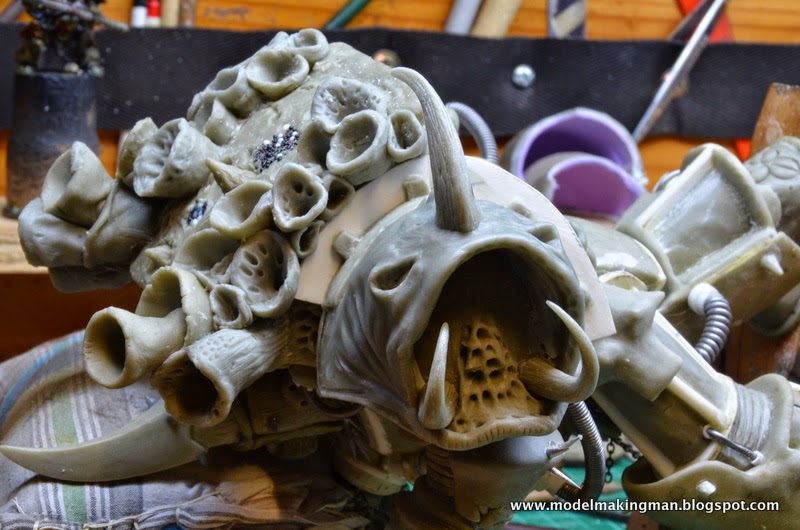

Here we see the modelling of the top of the head with the horn in place, eye sockets and a bit of skin fold detail started. It looks sort of benign and frog- like at this stage, even with those fangs. I'm sure such niceness can be eliminated with a few teeth.
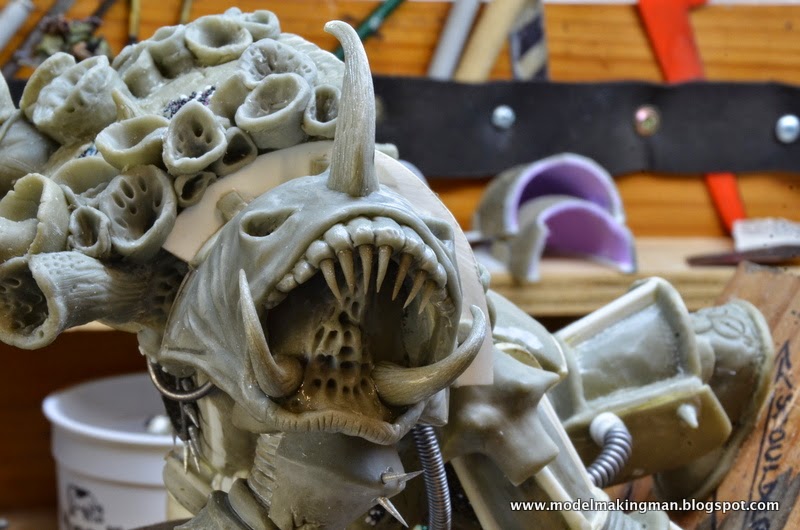
The teeth were made of Apoxie which had been rolled into a number of equal sized balls. Each small ball was then rolled into a cylinder and each end of the cylinder was rolled into a taper.These twin sharp ended shapes (like spindles) were then slightly curved into a bow. I now had quite a number of potential teeth, all I had to do was cure them in the turbo oven (10 min. @ 140 degrees C.) Once they were cool, I cut each bow shape and voila, two nice pointed teeth. This process gave me a choice of many teeth and I was able to match them to each other and their position in the jaws. They needed gums to be set into and I think animals that show their gums and teeth when angry are the fiercest looking, so this guy really got a set of humungus gums.

All the teeth in and what a pretty smile he has. A face only a mother could love but then again, this bugger probably ate his mother, warts and all.
The eyes are those jewellery/ pearl things I used for the torso signals buttons or whatever they were.
A difference you'll notice between the two preceding pics, is that the areas at the front and back bases of the shoulder guard have modelling done to them.


These areas seemed to need something and even though the illustrations don't show much, I was able to fit in an arm at the front, and a tentacle at the back. I'm quite pleased with the arm, as it seems to be hanging on for dear life, whereas the tentacle just wants to keep away from that mouth.

On the right pauldron, the miniature has the typical Nurgle arrangement of three skulls. I decided to put three 'skullish' type things, a zombie head, ghoulish head and, yes, a skull. These looked a little lonely so I added some putty spikes as well. The curve in the spikes looks especially nasty and definitely discourages any nurgling trying to climb up Uncle Typhus' arm.

Speaking of skulls, here is the mould for making them. I thought I would need a few for the base so made another to speed up the process. One of the skulls was drilled out to take a chain and become that detail seen in the top illustration( but not on the miniature).

Here it is in place attached by pustulated bits of armour, all hived out as usual

This is a shot of the cast skulls ready to be undercoated in my spray booth. I could have shown them after that operation but you wouldn't have seen them against the general blackness of the booth.
(A)

(B)

Here they are - (A) Mounted on cottonbuds (skewers were not thick enough for the holes I had made with extra drilling and individualising of each) and painted with Citadel Bleached Bone.
(B) Washed with a mixture of Brown ink, Chestnut ink and Agrax Earthshade.


(Note how long his right arm is. I did and was not well pleased. Some radical surgery was in order - drastic at this stage of a project, but necessary and do-able)
No comments:
Post a Comment