I started out in my usual method of drawing a squared up plan, in this case based on the dimensions of an existing model, but found it was easier to use that model's dimensions and multiply them by a factor of 5. This gave me a total height of approximately 200mm.
Now most large "additive" sculpts are built by adding material onto a supportive structure or armature. I build my armatures from soldered galvanised wire and this really sets up the action in the figure, how it is seen to be about to move, before it is frozen in time. Because Typhus uses a giant scythe (called Manreaper by the way), I felt that it would be held low in the right hand to deliver a more sweeping blow, not the downward chopping action of an axe. Also, this scythe is HUGE, much larger than Festerheart's axe, so the act of getting it to swing would take a lot of body motion and so I worked on a golfer's downswing, where the hips are turned before the shoulders come into play. The starting wire work seen here shows differing angles of hips and shoulders BUT things just did not work out that way.
I really enjoy soldering and think that I can build anything just with wire. Wrong! Here we see the wire armature, hips turned 45degrees to the shoulders etc etc, but this did not allow the plastic parts, especially the bulky, boxy torso that all Space Marine terminators have, (see the real sized grey plastic miniature torso, come chest, come backpack), to fit.
The 3rd pic shows a bottle of super glue Kicker, the accelerator liquid to make the glue cure almost instantly. Since this was taken, I have replaced the dropper top with a hypodermic needle and find I can control the flow of the very thin liquid much better.
Now comes the fun part, modelling the head - get this right or get out of town. The above shows two heads, one in old resin on the left, the other in Apoxie Sculpt. The block of resin was, as I mentioned, old, and as such was full of air bubbles and soft (a lesson for me not to be too miserly and buy some new). I always knew that this head would have to be carved because the horn needed to be sharp. The lower features of the head would be added to a fully shaped, sharp, hard horn. To make it, I formed a suitably over sized block of the putty and ground it down on the sanding machine, to be finished off with the motor tool shown. I'm not sure how toxic the powder from this putty is (resin being quite nasty), but I use a respirator and mask when any extensive grinding is done.
There aren't many pictures of Typhus about. I've found five and these don't help a lot, which you can also say of the model. Its head is tiny and the detail is sort of hidden in the hollow of the torso piece. These are drawings gathered so that I could build up a picture of what exactly I was looking at and hoping to build.
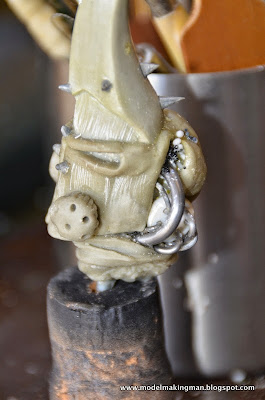
The details I found in this tiny little head astounded me. Really it is only a few mm long and yet there is all this stuff to make and define in the much larger scale I work in. I found that his head is a mask, and not only a mask but a half mask! It's complete on the right side and open with all manner of tubes etc, on the left. This was my first encounter with Typhus' "hive" bits, those round, raised and holey protuberances on the front. I think he really is just full of flies, the favoured insect of Nurgle, the chaos god of pestilence.
Materials you see used here include: putty, solder for tubing, micro balls for pustules, a squashed lead sinker, spikes of sharpened hard plastic and white styrene plastic for connecting bits.
I kept the head on its wire support as the final form of the torso had a corresponding tube to receive it.
So here he is, in the hollow of his torso, looking to his left where he will be directing his rage, to be delivered by a dirty great scythe that men have named "Manreaper".
The next entry will deal with this weapon and I might see about some legs as well.


No comments:
Post a Comment