Saturday 7 May 2016

Peace on a Beast Part2

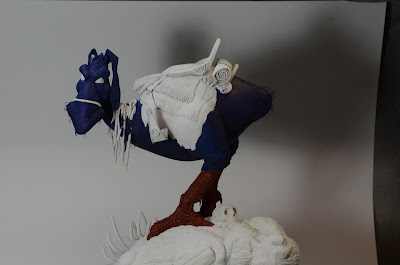
This is the completion of the blog started in July 2014 and concerns the model of William Stout's red rider on the angry dodo bird or" Peace on a Beast".


 These four show the progress that had been made since the start in 2014. Things come up and modelling gets put aside, that's life.
Obviously the whole thing is nearly complete except for some details such as a coil of rope, a sword and scabbard and a waterbottle. The stirrups are lead sheet as are the arm wrappings and decoration on the rifle. Reins are braided thread and the ears and saddle are Worbla (a material used in costume making which can be moulded to conform to simple shapes on the application of heat from a heat gun). All the main parts are Apoxie Sculpt even down to the ribcage, the rock covering and the base. When I put the rider in place, the balance of the whole seemed out a bit so I raised one side by making the black plastic edging higher and that fixed everything.


Painting starts with a layer of Citadel Corax white which disappointed me in that it dried quite dusty and pebbly unlike the old Skull white which it replaced.It could have the application or the conditions but all the pieces required a deal of attention to get them smooth for the subsequent layers, a real pain. Because I would be painting bright colours, reds,yellows and blues, the undercoat needed to be as light as possible.


Using a combination of Citadel and Vallejo acrylics the beast became a riot of colour. Very rarely do I choose such bright tones but this subject required them and I must admit it was a pleasure to use them, certainly a change from my normal Nurgle palette of greens and greys. Washes,inks and glazes all got a workout and the legs particularly benefitted from their application.
You might notice some bum and muzzle hairs which were such fun to put in one at a time- phew!


The rider got the same treatment of colour application, from a dark base to lighter layers up to the highlights. The rifle was masked as it would require very careful painting with fine brushes while the figure was airbrushed from a vertical position to simulate overhead sun.


Here is a closeup of our hero to show the complexity of the rifle even without the curly wire coils at the top. He is missing the arm bands which were made from strip lead and were such fun to stick in place. I'm not going to go into detail about the hands, suffice it to say that the next creature I sculpt will either be an amputee or have hoofs! That left hand had to hold the reins and each one had to be made to fit into slots at the thumb and the base. It would have been good to know something like that had better been planned for, before they were attached.


 As is my usual practice, I like to see the thing come together even if it is not quite there yet. I think I am convincing myself that there is an end in sight and that with just a bit more work it'll all be finished soon. That base had other ideas and required a multitude of layers,drybrushing, washes and a fun filled application of a blood pool (which would not set, and shrank and dribbled and made a hell of a mess altogether).


As anyone who knows this picture by William Stout, it has a strong yellow background with orange and white shadings and streaks, together with a couple of flying creatures. I could not do the whole job justice without trying to emulate the true scene and here she be! And there's the waterbottle! That's mine alone.

DIMENSIONS: Height  36cm         Base  25x13cm


PS    If you are interested in the beginnings of this build, go to the entry for 25th July 2014. I had to because I didn't know what condition I'd left the poor thing in.


Tuesday 26 May 2015

Stega-Zombie


My grandson's birthday is coming up and we had talked about making a model of Dr. Zomboss (the Egyptian version), and this would be a really complex build but that's what you do for a great kid don't you? However, he is aware that my favourite dinosaur is the Stegosaurus so he changed his mind and decided that a zombie dressed in a stegosaurus suit would be something that both of us would enjoy, what a nice thoughtful boy. Above is the full sized sketch for the model  and this time it is the right way around, woo hoo!


I put a zombie together for the job but the only head I had at the time without casting a new one was this rather sad mess. It had come about because the resin was either old or not thoroughly mixed and there are flaws all over it. These were cleaned up with some Apoxie Sculpt  and the limbs were added in a suitable zombie reaching out for brains, pose. The fingers were plastic tubes bent in a candle flame and slotted onto stubs of rod previously attached in their finger positions.


As per the sketch at the beginning, a spine of galvanized wire was attached and curved to allow the fill materials a structure to follow. This spine is reinforced with a loop of wire and soldered in place. Now the form of the body is established and the bulking up process can begin.


The top photo shows foil being attached with hot glue and tie wire. The lower one shows the plastic beak which allows putty to be placed in an overlapping fashion for the snout of the steg. Teeth and gums have been inserted to give the true zombie appeal that we all know and love.

 
 Putty has been added and the form of the whole sculpt is easy to see. In taking these photos, I added the eyes, even though the small one kept falling out. A figure just doesn't look right without eyes but they are not permanent at this stage as they need to be specially treated with a gloss finish and hence get added at the very end.


Now apart from the plates on its back, what makes this creature unique is its "Thagomizer", or those four spines at the end of its tail. The popular cartoonist Gary Larson( of The Far Side fame), used the term "thagomizer" in a cartoon to describe what killed poor old Thag, and palaeontologists really took the word to heart and it is now recognized in the lexicon of palaeo terms. Isn't that great?


More putty added and the look of a costume suit hinted at in the heavy join line at the front.


The steg's head has been modelled with pearly beads inserted as eyes. All that needs doing now are the limbs covered, feet completed in some sort of 'over the shoe' claws and of course, the back plates.
I see in this pic that the hands need some work to blend the junctions of the fingers.


How I made the plates. I drew them up in size on a piece of egg carton cardboard, coated this with super glue on both sides and cut them out. The glue really stiffens any porous surface and is especially good for sealing plaster, it makes it feel like ivory or plastic. I'm not sure that this cardboard was the best choice as it is a bit too textured in the end, but I stuck with it as the easiest option.


Well here is the finished model minus a paint job. The balance of the figure was such that it needed to lean forward to look any good so an appropriate angled plaster piece was used and the zombie was attached by the projecting wire built into its foot. Large buttons were added to the suit to give the appearance of a somewhat baggy, illfitting affair that only a zombie would wear. His fingers have been suitably knobbed at the joints and there are a few rips and tears at knee and elbow.
The feet are obviously over his shoes and are clawed and gnarly.


A final view with a bright red paint job using both Citadel and Vallejo acrylics without too much layering or blending. The checkerboard base is something that I like and having used it in the Cool Dude Zombie with Pawpaw, it's a keeper and may just be seen again if I make a Tricera-Zombie.
What next? A series could be in the offing but don't hold your breath.


Tuesday 28 April 2015

Aircraft Racer Part 1


These are two photos I found on Pinterest and they gave me a real use for many of my older aircraft  model kits where the plastic is brittle and the decals are shot. Subsequentally I have found a lot more, some where the fuselage is reversed just to be different. The idea of making an even vaguely sensible vehicle is new to me and as ork buggies do not qualify, I faced the dilemma of proper wheels and suspension, things I have taken for granted in the past.


This is an old Matchbox Bf109 in 1:32 scale so it is a good size and should lend itself to a nice level of detail. I did not count on the fragility of old plastic because when parts did not quite fit they decided to break, hence the large amounts of filler employed in the construction. The wings were cut off to stubs and the tail plane removed to be rounded off with car body filler or bog. One unfortunate thing happened in trying to get an overall impression of the car with its canopy in place, I bumped my arm and the 3 part canopy decided to separate with the only essential part, the front screen disappearing down the back of the largest, heaviest cabinet in my workshop. Oh great!

Forget this for a while, I can always empty the thing and muscle it away from the wall to retrieve the bit later, now however there is the problem of wheels. Even though the main part of this build is a kit bash, I do not have suitable wheels for a car of this size (lots of 1:35 tank wheels, much too small) and as I am a scratchbuilder by preference, my wheels would be made by me.


These show the process I used. I made a master wheel half, cast it then joined the halves to complete the wheel. The top pic is a circular screeding jig made to form a sausage of Apoxie Sculpt into half of a tyre and happily, it worked! Wonders never cease. A ring of copper wire was added to form a wheel rim and a central hub as well then the whole was cast in silicon rubber. In the lower pic the grey master, pink mould and white TC890 resin cast can be seen. From the shadow in the final cast you can see that there is a reasonable wheel well and this is adequate to hold the brake drum etc.
Two of these cast halves were joined to make a slick tyred wheel 52x13mm and all I had to do then was make 3 more.
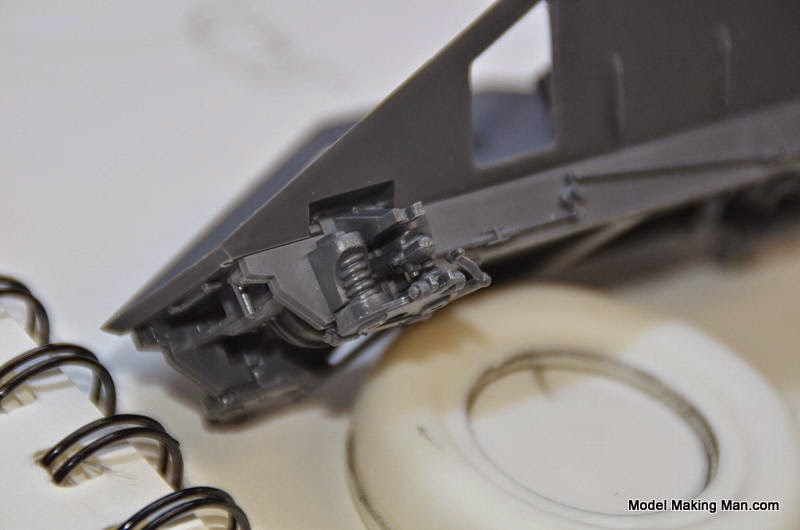
Now came the bigger problem of suspension, that mass of struts, springs, rods and stuff that joins the wheel to the body.This would be so visible in the model that it had to be done well enough for my engineer friends to look at it and nod in the affirmative. I did a lot of research and became  thoroughly confused with the plethora of systems that have been employed over the years but, in breaking up a superfluous to requirements Tamiya Sd.kfz 222,( a small armoured car), I found a suspension that could do the job. The next three pics are of this arrangement and its main constituents are two large vertical springs partially enclosed in cylindrical supports.


Here is a sketch of the suspension to help me decide on what I had to build and the dimensions that would suit the size wheel I had.The resultant size was about four times the small model and so basically every dimension was doubled, giving a X4 ratio for the two measurements of length and breadth.
 
 
This shows lengths of copper wire resting on my sanding board (with strips of different grits of sand paper). I needed a strong flat surface to straighten the slightly bent wire and the board, when rolled over the wire on a hard substrate, converts it from the two bottom wires to the pretty straight top one.


Before I leave the sanding board which makes flat sanding so easy, I would point out that it is mounted in an old picture frame and that makes cleanup of sanding dust a lot easier. I can rub a cast resin piece on the three grits in order and get a nearly finished surface and then vacuum the whole board to remove the dust.


 Making the springs was easy with nice straight wire, a vice and a compatibly sized form to wrap around, in this case a steel punch.


While talking about the model with my artistic son-in-law,we got onto the fact that the wheels would look better with a tread pattern rather than the cop out slick look. So, this is my workbench at midnight after we explored every thing that could give a tread-like texture to my wheels. We finally decided on the knurled sleeve of an old brace and bit and even though I was tempted by some really cool mesh patterns, I did go ahead with it.
The photos below show the sequence of transferring the knurling pattern onto a strip of Apoxie Sculpt and the adhering of this strip to the wheel.


A rolling board with 1mm high sides was made long enough for the circumference of the wheel and marks for an appropriate width(one wide enough to cover the top as well as part of the sides ). A sausage of the putty was laid down the centre and a smooth roller (a piece of 1inch gal pipe) was run over the top, the 1mm side pieces assuring a 1mm thickness of putty.


Here is a sideways look at the knurled cylinder from the brace and bit doing its job of pattern transfer onto a well flattened strip of putty. Note the white talcum powder everywhere, this is to prevent putty sticking to the base board and to the rollers.


The purple lines define the width I deemed necessary to go over the wheel and drape down the sides and a thin steel rule cut the textured putty to this size. Now to get it off and onto a wheel.


Let's just say it didn't give up without a fight, all 1mm of it. I had to shimmy a knife blade under it for the whole length before very gingerly transferring it to a larger but smoothly rounded surface to cure a bit more before application to the wheel.

My electric jug on its side made a good resting place and I even remembered to powder it.


This is the jig I made to do the tread transfer and I'm pleased to say it worked! PVA was applied to the wheel and the strip draped and rolled on, just like that. The right side with the screws is removeable to allow the wheel to be mounted spinning on an axle that also carries two 1mm discs. These discs are what will terminate the overlapping putty and give a defining line along the side of the wheel.


 That operation is seen here with a fine tool gradually bringing the putty edge up to the disc edge.
 
After this was done and the putty fully cured, the disc will be removed and the wheel cleaned up and finally detailed. I will leave that to the next entry.